Hey Jake
It looks like you have successfully linked up the "My Calculations Page" to the "My Configuration Page".
However, it appears that your problem is with linking the text boxes on the widget.
There are no problems to design dashboards in older versions of Excel (in fact we only recently discovered the Selection Pane and used to design our widgets without it!).
We've made this small tutorial especially for Excel 2003.
Please find below the working file and small explication.
Warmest regards and please feel free to ask any further questions you may have.
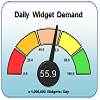
DashboardWidgets
--------------
Step #1
I can see straight away that one of your problems is with the textbox automatically returning to the default font and text size. Note in the image below the small black dot is actually a resized traffic light with font-size "10pt" and font-color "black" (when we want font-size "60px" text-color "green")..
I also notice that some of the traffic light circles are cropped at the bottom (and some are over-size) so perhaps it’s best to start again with a fresh copy and paste of the widget.
Step #2
Delete the current widget.
Open the original Excel Dashboard Widgets spreadsheet (the special one we prepared for you for Excel 2003) and copy and paste the traffic light widget into the new spreadsheet on the “My Dashboard” tab. Your dashboard should look like this..
You’ll notice we’ve lost the title of the widget (the text box is still there but the contents are empty) but the rest of the widget is intact.
Step #3
Ungroup the widget by right clicking on the top-right corner of the widget and selecting GROUPING > UNGROUP
After you select UNGROUP, you should be able to see all the individual widget elements as follows..
You’ll notice that the Title Textbox is not linked so let’s go ahead and link this to the configuration page now.
Step #4
Select the SELECT OBJECTS tool from the bottom of the page (it’s part of the SHAPES toolbox).
#5.jpg (21.68 KiB) Viewed 4864 times
Draw a large selection box (larger than the text box you want to select) starting outside of the widget on the top-left and finishing outside the widget on the middle –right (see the faint dotted lines in the picture below).
When you let go of the mouse, you should end up selecting the title textbox. Your dashboard will look something like this…
You’ll notice that the title textbox is linked to cell F71 (that contains no text, hence the title is blank). Let’s link this to the dashboard configuration page.
Step #5
With the title text box selected (see step #4) carry out the following steps..
5a. Click the formula bar.
5b. Delete the current contents.
5c. Type “=”.
5d. With the mouse, click on the “My Configuration Page” tab.
5e. Click the widget’s title text cell.
5f. Press ENTER.
Your widget should now look a little like this…
However, there is one VERY IMPORTANT OBSERVATION – the text box has reverted back to the default font and font-size. This is important because later on when we link the traffic light text boxes you will notice that they revert back to the default font size (10pt) when actually they need to be put back to “60pt”. This is the reason why there was that small black dot in the first picture!
Click on the font-size box and change the font-size back to “36pt” bold and red color.
Now let’s start to link up the text boxes on the traffic light widgets!
Step #6
This next part is important – TURN OFF THE SELECT OBJECTS TOOL (your cursor should turn back from an ARROW into a WHITE CROSS).
Click the red traffic light – you’ll notice it is currently linked to a cell G65 in an external spreadsheet!!
To link this to the correct cell on the “My Calculations Page” follow these steps..
6a. Click the formula bar.
6b. Delete the current contents.
6c. Type “=”.
6d. With the mouse, click on the “My Calculations Page” tab.
6e. Click the first traffic light upper box (cell G5)
6f. Press ENTER.
The red traffic light text box is now correctly linked – however, Excel has reverted the font-size back to “10pt” (when it should be “60pt”) and the font-color is BLACK (when it should be RED). Press F9 a few times and you should see the small black dot!!
To revert the red traffic light back to its original settings change the font-size to “60pt” and the color to “RED”. Press F9 a few times and you should get a red traffic light like this!
Follow the same procedure for the other eleven (11) lights and you should end up with a dashboard like the one we have attached below. Note – I’ll send you the unlocked version in a private message.
(124 KiB) Downloaded 483 times
Hope the explanation is clear. Let us know if you have any problems.
Cheers
DashboardWidgets